Love

Love

Monday, March 31, 2014

Money Saving Monday: Do It Yourself Crown of Thorns


I remember a few years ago seeing a picture one of my fellow Catholic friends posted on facebook of a crown of thorns she had made herself. Not only was it was big enough to be the centerpiece for her table during Lent, but it was beautiful. What a perfect reminder of Christ's suffering and death He endured for us! As a Catholic, when praying the Sorrowful Mysteries of the rosary, we meditate on the Crowning of Thorns on the 3rd Sorrowful Mystery. Every crucifix in our home (and we have enough to have at least one in each room, bathroom, and hallway thanks to generous guests at our wedding who gifted them to us) has an obvious crown of thorns on Jesus's head. Now that my kids are getting a little older (5) (3 1/2) and (17 months), I've been trying to explain what Lent is, what sacrifice is and why Jesus sacrificed for us.

Now rewind to a few weeks ago. I was doing some Spring yard work and clearing out old leaves from around the rose bushes in the front yard. The rose bush, full of thorny branches, kept pricking my fingers as I cleared around it's base. Then I realized the rose bush branches would be a perfect guinea pig for me to try a DIY crown of thorns.

This is how my crown of thorns turned out.
 

Do It Yourself: Crown of Thorns

 
  1. Cut 7 or 8 six inch pieces of thorny branches. The longer the better. If you can, cut them around 12 inches.
  2. Find some brown thread/string. I used some brown embroidery thread.
  3. Wrap the thorny branch pieces in half or full circles and secure by tying the thread around the pieces.
It's that simple. I probably didn't need a tutorial, but there it is. I just have ours on our table with this random candle as a sort of Lenten centerpiece. It's big enough to fit on our heads and hurts! I've let the kids touch the thorns with their fingers and tried to use it as a teaching point for them to understand how much Christ endured during his passion. However, I did have to make a rule that no one is allowed to pick up the crown or place it on anyone's head...even your own head.
 
Ironically, the same day I made the crown of thorns, I received an advertisement for a local Christian store. I flipped through it and saw a crown of thorns for sale. They were asking, wait for it, $79.99! I couldn't believe it, so I took a picture of it to prove that I'm not making this stuff up. If you use the 25% off coupon in the advertisement, the price drops to $59.99. Still, I'd never pay that much for something you can do yourself for free.
I've seen some really cool ideas incorporating the Crown of thorns on Pinterest. Now, if you follow me on pinterest, please know that just because I may have pinned something, doesn't mean I've actually done it. I'll be honest, I haven't actually tried any of these, but Lent isn't over quite yet. If anything, maybe you could try them. Here are links for my Favorite Pinterest projects:
 

Top 5 Pinterest Crown of Thorns Projects

  1. This one is from Catholic Icing. She has AMAZING Catholic ideas on teaching (a preschool curriculum), recipes, arts and crafts, saints costumes and so much more. Please check out her blog if you get a chance. Here, she takes a wreath and places (painted) toothpicks inside the wreath to make the thorns. Each time your child does a good deed or makes a sacrifice, they get to pull 1 thorn out of the wreath a.k.a. Crown of Thorns. The goal is to remove all the thorns by Easter and then transform the wreath into something beautiful on Easter morning. 
  2. This one is from Waltzing Matilda. She makes a big crown of thorns and uses it as a centerpiece on her table with a purple (for Lent) candle burning in the center.
  3. This one is from Sojourn Kids. They use paper crowns (think Burger King crowns or apparently you can purchase paper crowns at a craft store or you can make your own from construction paper) and decorate half with stickers, jewels, etc and make paper thorns on the other half. They call it, "Crown of thorns/Crown of glory" art project. It seems like a neat visual for children to see that Jesus was both the bearer of such suffering as fully man and also the bearer of all the glory as fully God.
  4. This one is from Three Sided Wheel. Of course I'm going to add anything that has to do with chocolate. This one seem easy enough: pretzels sticks and melted chocolate. Layer them into a crown of thorns and allow to dry. In the blog she says it's a perfect treat for Good Friday. I'm pretty sure I'd make the chocolate crown with the kids on Good Friday and purposely not eat it until Easter Saturday night or Sunday morning (after mass). This way, the kids could learn a tangible lesson on sacrifice, which as I have been trying to teach my kids as, "Doing something that is hard because you love someone".
  5. This one is from Catholic Inspired. She uses her palm from Palm Sunday (in 2 weeks from yesterday) to braid it into a crown of thorns. This link actually provides tutorials for lots of ideas on how to braid your palms. Never knew it until after browsing through her site, but apparently, I have always done the "4 square palm braid" that I learned from my mom as a girl.
So there you have it. Money Saving Monday tip is: go out to your yard and make a crown of thorns for Lent. Passion Sunday is this Sunday. The crown of thorns can be a perfect visual aid for your family as we journey into Holy Week and Easter Sunday. Happy Money Saving Monday!

Monday, March 10, 2014

Money Saving Monday: Meal Planning

Meal Planning. So, I guess this blog post could be the sequel to my earlier post on shopping at Aldi. In case you didn't get a chance to read it, I basically said that for the past couple years, I've been shopping for 95% of my groceries at Aldi and I do this every 2 weeks with a budget of $175-$200 each trip. I get the other 5% of groceries at Wal-Mart. When we moved to Alabama (almost) two years ago, we were hit with a 9% sales tax on all groceries-ouch! This was really wrecking my budget (and stressing me out because I really don't like grocery shopping and budgets in general, but my husband really likes budgets) and in order to trim all excess off what I was buying, I needed a way to make sure I was solely buying essential items. Thus, the 2 week meal planning menu was born.

Now before you get your hopes up, I have to be honest. We're not a paleo family...or a vegetarian family...or an organic family. I take most of my meal ideas from meals my own Mother and Mother in Law made, which were/are very much meat-and-potatoes type meals. After all, we're from Kansas and farming is in our DNA and ancestry. Don't get me wrong; some of my meal ideas are vegetarian and I could probably tweak some into a paleo diet. But basically, I buy my groceries from Aldi's selection that is priced the cheapest. For example, I buy bagged frozen chicken breasts in the freezer section; I buy a bag of baby carrots, not organic carrots; I buy canned cream of mushroom soup instead of making my own from scratch. So, keep this in mind when reviewing my menu ideas.

Also, I haven't perfected the method to my madness. I've read some blogs or talked to people who have excel documents or binders full of meals, menus, grocery lists, etc. However, mine are just on two laminated (if taping them with packaging tape counts) index cards.  I put magnets on the side of the refrigerator so I can easily find it, add to it, and easily take it with me to the store. One of the index cards holds "Meal Ideas" and the other holds the "2 Week Meal Plan".  The "Meal Ideas" card has a running list of meals that my family has loved and worked well in the $175-$200 budget. The "2 Week Meal Plan" is really two sided. On one side is just a rough, free-hand-drawn chart where I can fill in the meal ideas for a given 2 week period. Then, I flip the card over and write out my grocery list on the back, taking into account only the items for those meals, snacks, desserts, etc.
When making your "2 Week Meal Plan" chart, keep in mind that yours will probably look different than mine. For example, I only write down meals that we all eat together as a family. For us, that means Monday - Friday, I only have 1 meal (supper) on the list. And on the weekends, I have 2 for both Saturday and Sunday, since most weekends, my husband eats both lunch and supper with us since he's around (we save breakfast for him but he's usually either working or sleeping in). I also don't add a spot for lunches from Monday - Friday since I usually do something like macaroni and cheese, sandwiches, noodles, etc that doesn't necessarily need to be replaced every shopping trip. Also, breakfast is not listed on my chart because it's almost always pancakes and scrambled eggs or oatmeal. The occasional cheerios and yogurt does happen, but it's rare.

Staple Food Items I Buy every 2 Weeks, Regardless of the Menu

  • 5 Dozen Eggs: Yes, I said FIVE DOZEN eggs lasts just long enough for 2 weeks.
  • Milk: We use 5 gallons in a 2 week period (lots of little ones drinking whole vitamin D milk). I buy 5 gallons and it keeps for 2 weeks! We always drink it up before the expiration date. There has only been 1 time that I had a gallon of milk be sour to the point I took it back to the store and they gave me a complete refund. And get this, I didn't even have the receipt and half of the gallon was gone (I was dumping it down the sink when midway through I realized I should take it back for a refund). There were no questions asked! There are no hormones added to this milk. (The picture is 2%, but it shows in the yellow that there is no hormones added).

  • 3 bags of Frozen Chicken Breasts: Most of my meals have chicken in them and the kids really like it over beef or fish. If I have 1 bag in the freezer when it's time to do the 2 week shopping, I'll only buy 2 bags. But I make sure to have 3 bags by the time I've finished my 2 week shopping.
  • Apples and Natural (no sugar added) Applesauce: I also make sure I have at least 2 bags of apples (I prefer Honeycrisp after living in the Pacific Northwest and being spoiled by the amazing, fresh picked apples) after the 2 week shopping. They keep for a long time, I'm talking weeks. I will buy other fresh fruit at Aldi like pineapple, blueberries, strawberries, and grapes and go through those the first week. The second week we eat more applesauce and apples.  My 5 year old also takes applesauce to school with him every day at school.
  • Peanut Butter.
  • Honey: My kids prefer PB and H sandwiches over PB and Jelly.
  • Pancake Mix: as previously stated, I buy 3 boxes and that usually lasts us 2 weeks.
  • Oatmeal: I like to buy quick oats and old fashioned oats (Aldi has both) and mix them together. My 3 year old daughter LOVES oatmeal for breakfast and so do I, so we go through it pretty fast.
  • Noodles: My kids love eating spaghetti and just plain noodles so I make sure I have some sort (bowtie, macaroni, tri-color, egg noodle) and Aldi has a pretty good selection.
  • Crackers: My kids love snacking on crackers. Our Aldi favorites are: animal crackers, square cheese crackers, cheese/peanut butter sandwich crackers, vanilla wafers, and graham crackers. 
  • Flour, Sugar, Powdered Sugar
  • Fruit: (besides the apples) I like to buy Aldi grapes, pineapple (especially when it's on sale for < $1.00), blueberries and strawberries. The ONLY fresh fruit I have ever had problems with from Aldi is the strawberries. Once (and only once in the few years I've shopped loyally there) I found some slug holes in the strawberries). But remember that you can take back anything you are not satisfied with for your complete money back.
  • Spaghetti Sauce (Traditional flavor): This is what I use for my pizza sauce and spaghetti sauce and it's also good for dunking cheese quesadillas in! It's amazing. So sweet and tangy. I prefer it over Ragu which I was raised on!


  • Potatoes: My husband says, "Potatoes are God's gift to the poor" and I'll admit, I love buying the 10 lb bag of potatoes for a few bucks. You can also get sweet potatoes for dirt cheap! I like to use them as potatoe fries (slice in French fry size pieces, toss with olive oil and bake for 425* for 45 minutes or so, season with garlic salt). I also like to use them with soups or as mashed potatoes.
  • Croissants: I try to make sure I have at least 1 tube.
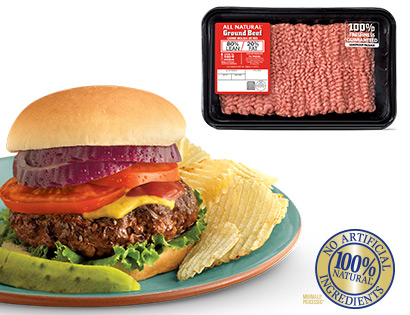
  • Hamburger: I've tried the packed meat (like in the picture below) and I usually buy the 90%, 10% (out of laziness so I don't have to drain the grease, and I guess because it's healthier). When I do this, I separate it immediately when I get home into 4 pieces of hamburger and put them individually into 4 sandwich bags. This stretches the hamburger out and my kids don't really like hamburger enough to have it all for 1 meal.
  • Bread: I prefer the whole wheat bread from Aldi that ranges in price from .89 a loaf to maybe $1.18 or so. I usually buy 2 loafs to get us through 2 weeks.
  • Sharp Cheddar and Mozzarella Cheese: I usually buy 2 bags of each. Many of my recipes use cheddar cheese and I love the way both mozzarella and cheddar taste. Plus, the price can't be beat.
  • Canned Beans: Green beans, Northern White Beans, Black Beans, and Pork and Beans. All are awesome and I use them all regularly!
  • Frozen Vegetables: I like to have a bag of frozen peas, frozen mixed vegetables, and frozen broccoli in the freezer at all times. (I like the steam able broccoli the most that steams in the bag in the microwave)
  • Brownies: Lastly, I like to keep a box of their plain brownie box mix in the pantry for if an event or party comes up. They are so good and make a huge pan (13 X 9, as compared to most 9 X 9). They also have a killer cream cheese addition on the back that I always get compliments for every time I make them!
  • Light Sour cream
  • Vanilla Yogurt. They have lots of flavors and even have greek yogurt that is pretty tasty. My kids prefer yogurt that doesn't have fruit in it.
As far as prices go, Aldi is considerably cheaper on the majority of items sold. I have a copy of one of my last receipts so you can get an idea of what things cost, at least for the Birmingham, Alabama area. 
Cream Cheese for $1.29, Kraft American Cheese (with no preservatives) for $2.79.
Whole milk for $3.39 is at least $.0.60 cheaper than Wal-Mart prices.
I love their maple syrup for $3.99, the 40 oz Peanut Butter for $3.49, 4 butter quarters for $2.49, 1 dozen eggs for $1.89.

 I even got some "extras" that I normally do not buy, like the cinnamon rolls for $2.99 and still stayed < $200.
 I love how the bananas are always $0.44/lb. The cheapest I've seen anywhere.


"2 Week Meal Plan" Card and "Meal Idea" Card


I know it's not the clearest picture, but this gives you an idea of what my "2 Week Meal Plan" chart looks like. Note that the weekends start with Sunday first on the left and Saturday is last on the right (for both rows). I use my "Meal Idea" list to get ideas of things that have worked in the past and also stayed in our budget.

This is what the flip side of the "2 Week Meal Plan" card. It is the essentials of what I need to make the meals on the chart, plus the staples (like 5 gallons of milk, 5 dozen eggs, a few boxes of crackers, etc.).


Again, not the clearest picture, but you get a general idea of how I keep track of my good "Meal Ideas". It's not anything fancy, by any means.

Our Favorite Lunch and Supper Meal Ideas

  • Home made Pizza: we love supreme, sausage, pepperoni, banana peppers, green peppers, onions, black olives, mushrooms and the occasional plain cheese pizza. I get the yeast packets at Wal-Mart and it looks like this. It is really simple; it advertises as "30 Minute" pizza crust and it is true to it's name! You don't have to wait for it to rise, which I love.
  • Meat Roll: It's sort of a calzone type roll with hamburger, canned diced tomatoes, cheese and whatever else you want to add. This one is from my Mother in Law and my husband's entire family eats this with honey either drizzled over top or to dunk each bite into. I have to admit, it's pretty good. I wouldn't make it if it wasn't good and my kids didn't eat it. I've made the dough from the yeast packets and I've also used croissants in a roll-up tube before. Both are good!
  • Hamburger pockets: Basically, it's ground hamburger with cheddar cheese that I stuff into the triangular roll-up croissants. I try to make them look as circular as I can by using a square (2 triangular croissants in the shape of a square, not separated). It sort of resembles and tastes like bierocks, which we both also grew up with, minus the sauerkraut (which I love by the way).
  • Hamburger Gravy over Noodles or Mashed Potatoes: Pretty self explanatory. I make the gravy by adding diced mushrooms, some minced garlic (1 T?), and chopped onions to ground hamburger. Then I add probably 1/3 cup of light sour cream, 1 can of cream of mushroom soup, and milk to desired consistency. The kids LOVE this one, actually!
  • Tacos
  • Chicken Enchiladas
  • Chicken Pot Pie: I buy the pie crusts where you can just unthaw the dough and bake it in the oven, then add the diced chicken breasts, 1 can of cream of chicken/cream of mushroom and bag of frozen vegetables.
  • BBQ Pork in the Crockpot: A summer favorite. I've done pork loins and pork chops with this. You can also do BBQ chicken this way. Just put the meat in with the BBQ sauce (like half a bottle) and the crockpot do the cooking.
  • Spaghetti
  • Breakfast Casserole: I don't have one in particular I use; I look up different ones on Pinterest, usually. But it usually involves hash browns, sour cream, cheese, and bacon.
  • Hamburgers and/or Hotdogs: Another summer favorite. We also like hot dog pockets (hot dog wrapped in croissants with cheddar cheese.
  • Meatloaf
  • Grilled Chicken Salad: We went on a salad kick last fall when I was training for my half-marathon and I haven't done them in awhile because I honestly got burned out on them! But I loved adding banana peppers, green peppers, avacados, tomatoes, cheese, and even the occasional bacon.
  • Sloppy Joes or Sloppy Joe Bake: The Sloppy Joe Bake is basically the croissants on the bottom of a pan with the sloppy joe mix, topped with cheddar cheese, topped with another layer of croissants.
  • Chicken Quesadillas: One of our all time favorites. I like to shred the chicken by boiling it for about an hour. Then I like to sate the onions, green peppers (and mushrooms if you like them) and mix it with the chicken. You can add whatever else you want. Some of our favorite add-ins are of course cheddar cheese, bacon, avocado, black beans and salsa. The kids are still not crazy about this, but they do love some cheese quesadillas dunked in ranch!
  • Grilled Cheese Sandwiches and Tomato Soup: Canned tomato soup and I like to add a can of diced tomatoes to make it taste more like Tomato Bisque. I also like adding parsley and basil to the soup.
  • Chicken Tortilla Soup: I like to make the chicken shredded, so boil a few chicken breasts for at least an hour. Then, add to the broth some chicken bullion cubes, 2 cans of white northern beans, 2 cans of black beans, and 2 cans of diced tomatoes or rotel. Top with light sour cream, green onions, cheddar cheese and eat with tortilla chips. This is another all time favorite, even for the kids! I got the recipe from one of my 6 sisters and love it.
  • Hamburger Vegetable Soup: This recipe uses the crock pot and is one of Gabriel's favorite. Basically it is (however much you want to use. I've used 1/4 lb and 1 lb before) ground hamburger, 46 oz v-8 tomato juice, 1 can tomato soup, 1 can of diced tomatoes, and a couple bags of frozen vegetables. I like to add diced potatoes and minced garlic, too.
  • Home Made Chicken Noodle Soup: I like to use shredded chicken. Add bullion cubes to the water used for boiling the chicken breasts. Add chopped carrots and celery and the egg noodles of your choice. My family loves to eat this over mashed potatoes and I have my husband hooked on this strange but yummy tradition. It makes the broth sort of creamy. And we also use either seasoning salt or celery salt on the top in our bowls.
  • Tuna patties: This is from my Mother-in-Law and is so good. Mix 1 can tuna (with oil, not water) with about a half stack of crushed saltines and maybe a half diced onion. Make into patties and fry in a skillet with some oil. Awesome with ketchup, although my kids still turn up their noses.

These are not the sole meals I cook, but they are ones that go over well and that I can plan for on the budget to buy the said ingredients. Many nights we eat baked chicken, mashed potatoes, and a vegetable or something similar. The above meals are ones that usually require specific ingredients other than what I may already have in the freezer or refrigerator. Also, this isn't taking into account fruit, snacks, etc.

I will say that I think in general, soups are a huge money saver but also very under-rated. Don't forget about soup, even in the summer! Whenever I make any of the 3 soups listed, they last us AT LEAST 3 nights of meals and usually my lunches for the following days. Plus, soup is just so filling that it doesn't take as much to make a warm, happy tummy. Try adding in some soup to your meal plan to stretch your dollar a little more.

Also, casseroles are another way to save money AND time. Do a double batch and toss the extra in the freezer for one of next week's meals.

I know my method isn't the neatest or prettiest or necessarily the healthiest, but it works for us. I hope in the upcoming years, I am able to buy more organic food, use home-grown food from my garden, and add more healthy options in our menu. But for the time being, it works. Hopefully you can draw some inspiration from my method and maybe even draw some cute little 2 week meal plan charts, too.

Happy Monday-Money Saving!


Monday, February 24, 2014

Money Saving Monday: Giving Haircuts

If asked 10 years ago, I never would have thought that I would be cutting hair for my husband and sons. Never. But I guess it only makes sense. You see, my husband is the 2nd in his family of 9 children. Of the 9, there are 8 boys. Including my father-in-law, can you guess who cut all 9 boys' hair growing up? That's right, my mother-in-law, Diane did! And it's a pretty cute story how she started cutting hair during medical school for her friends. Looks like that skill came in handy having 8 sons!

Christopher and I dated from senior year in high school and all through undergrad. Fortunately for him, we went to Newman University, which was local so he could still have Mom cut his hair during undergrad. When we got engaged junior year of undergrad, I knew I had to learn...and fast! I didn't have that much time to learn. We were getting married after undergrad graduation and moving that same week to Kansas City for Christopher to start medical school and for me to start my first RN position. Only a few hours away, we would still be able to travel "home" to Wichita fairly easily, but as his wife, the hair-cutting responsibility would soon be mine. So, basically I started sitting in and asking Diane to teach me as she cut his hair from our engagement on. I was thrilled when the Christmas before we got married, my mom and dad gave me a hair cutting kit! It wasn't a super expensive, big name-brand kit. However, it has been well loved and survived going on 7 years! The only thing we have replaced is the "beard trimmer" (or what I use for trimming side burns, neck hair, etc) because the original wasn't cuttin' it (pun intended). Honestly, it was apparently painful for my boys when I trimmed neck hairs and side-burns. We got a Wahl. It is well worth the money to upgrade and really wasn't too expensive considering all the money hair-cutting has saved us over the last almost 7 years.

My haircutting experience has been overall, pretty good! Luckily, my husband is very forgiving and pretty laid back and my boys are luckily too little to care what their haircuts look like. Christopher has NEVER made me feel bad, guilty or lousy from a bad haircut I've given him. The first solo haircut (without my mother-in-law looking over my shoulder or taking over when I messed up or gave up) was a little scary. I vaguely remember thinking it sort of resembled the bowl haircuts from the 90's.
I promise this isn't one of Christopher's worst ever haircut from me. Look it up. it's stock!

I don't think it was really that bad, but you get the idea. Thankfully, I didn't give up because it really has been a way for us to save some $$$ by the end of the year. I'm not even sure what a men's haircut would cost. But for those of you who do know, the savings only increases the more boys you have! I haven't had to cut Gianna's hair yet because she's only 3 and I'm letting it grow as long as it can for now. And besides trimming bangs, I'm not brave enough for my own hair yet, although I might try it in the future.
This is more likely one of the worst first haircuts ever given by yours truly, and of course it was right before Gabriel's baptism. 

This haircut ties for worst haircut ever given by me...and Gabriel's haircut isn't too wonderful either...


So, I just gave Gabriel a haircut and decided to do a tutorial for my adaptation of a crew cut. I leave the front a little longer, just because I was taught that way and my boys prefer it that way. Cutting a child's, or better yet a baby's hair is MUCH more challenging than cutting an adult's hair. These tips may help when considering cutting your little boy's hair for the first time.

Tips for Child Haircutting:

  • Cut their hair when they are in a good mood. Well rested. Well fed.
  • Bribe and bribe heavily. Usually, I give my boys a few chocolate chips or candy as a "reward" for sitting still during the haircut. Or I let them paint or do some fun activity afterwards.
  • Put some aprons on them or cut their hair while they are wearing underwear or diaper only. I can't stand the little, loose, itchy hairs post-haircuts and I know my boys don't like them either. It just makes things easier afterwards for clean up.
  • Distraction, Distraction, Distraction. Get out the iPads, laptops, iPhones, etc. I gave Gabriel a broken clothespin during his last haircut and asked him to fix it for me. It gave him something to fidget with during his haircut and helped him stay still.
  • Choose an appropriate location for cutting their hair. I like to sit Gabriel up on a high stool in the kitchen so I don't have to bend over to cut his hair. But when my boys are babies, I cut their hair in the bathtub. That way, they can move around and play. I like to give the babies combs to play with during their haircuts. For some reason, they get so distracted with them and love chewing on them!
  • Prepare them well ahead of time for what you will do next while cutting their hair. Gabriel just hates the "buzzer" (trimmer) and he knows it's always the last part of getting his hair cut, but I still warn him and take breaks with it if he is stressing about it too much.


Cutting Hair, the Tutorial

Step 1: Wet their hair and comb it out as flat as you can.

I like to use a wet towel for getting their hair wet. It's more controlled than a spray bottle and I can make it warm so it's not so traumatic. I also use the flat side of the comb (opposite of the teeth part) to get it flat against their forehead. It makes it easier to cut in a straight line.

Step 2: Cut bangs/front.

Remember that it's better to start of cutting only a 1/4 of an inch or so at first and do more if necessary than to cut too short and be stuck. Cut as straight as you can. Cowlicks make things a little more interesting. Gabriel has a cowlick on his right.

Step 3: Cut side-burns and hair around ears.

Again, remember with the side-burns that it's better to cut just a tad at first and then cut more if you like them shorter. I tend to accidently cut them too short right off the bat and then I'm left waiting for them to grow back in. When cutting the hair behind their ears, be sure to comb it over the top of the ear so it doesn't lie flat against their skin and accidently stay longer than the rest.

Just comb out the side-burns and cut it.

This is what I mean about combing the hair out on top of the ear. I usually trim it so it barely touches the tops/outside of their ears and go straight down to the neckline from there.

Step 4: Cut the back of the neck hair.

This is pretty straight forward. Just be sure to cut it as straight as you can.

I usually have them look down while cutting their neck line.

Step 5: Layering

Layering is my favorite part up to this point. You basically pull a strip of hair between your fingers parallel from their head and snip about a 1/4 of an inch (or whatever you cut for the rest of the hair around the front, ears, back of neck). You do the same for the cowlick on the back of their head, the side of their head (by side-burns), back of their head, and top of head towards the back of the neck. The only area to leave alone for now is the bangs and top of their head.

Just snip the hair sticking out on top of my fingers.
Again, cut the hair on top of my fingers, not under my fingers.


This is showing his cowlick at the back of his head and how you still layer around it.

Step 6: Layering the side-burns.

For this part, put your comb vertically between his ear and side-burn and comb out the hair towards his face/nose. Then just cut it vertically close to where the vertical part of the side-burn is.
Comb out the hair towards his nose/eyebrows.

Cut it vertically.

Step 7: Layering the top/bangs.

For this part, I pull the strip of hair between my fingers like I did when layering the rest of his hair, but I pull it in horizontal strips (from ear to ear) instead of from front to back. I do this so I can basically leave the bangs un-layered. I've had too many bad experiences with trying to layer the bangs too close to the front of the hairline and you end up with a super short, un-even haircut!


Pull the hair in horizontal strips (from ear to ear instead of front to back strips) when layering the top. This is also the farthest up towards his bangs I go. Any closer and you start messing up your straight line you cut on Step 1. 

Step 8: Trimmer for side-burns and neck hair.

This is the least favorite part for my boys but probably my most favorite part. Just hold the trimmer and touch it to their skin. Easy peasy. Trim under side-burns, next to side burns, and neck hair.

Using the dreaded trimmer.
I also use the trimmer to go up vertically along the side burns to even out any lines made from cutting the bangs in step 1.

Step 9: Shake off the hair, give rewards, and look at your handsome little guy!

Before....

After!


And after giving the haircut, there is one more trick that my mother-in-law taught me: the person receiving the haircut always sweeps up the hair. I guess I have a couple more years before I can reap the benefits of that one with Gabriel and definitely with Benjamin. But I will say I have never swept up the hair after Christopher's haircuts.

So, I highly recommend considering learning how to cut your loved one's hair. It's really not that hard and it is an investment! Especially if you end up having 8 sons some day. Happy Money-Saving-Monday!

I did all the guys' haircuts here and they don't look too shabby!

More of some better haircuts for my boys.


Monday, February 3, 2014

Money saving Monday: Homemade Powder Laundry Soap-5 X's cheaper than store bought!

 
I remember the days I despised buying laundry detergent at the store. Literally, I dreaded the day we ran out and I would inevitably go over our budget by at least $20 buying detergent that would maybe last me a couple months. Store bought laundry detergent seemed like the only option: it was convenient and it cleaned my clothes. Honestly, I never knew that people still actually made their own soap. At the time, that sounded like something people did during the Great Depression because there was no other options. And besides that, I was working full time, Christopher was in medical school, we had 2 little ones and there was no way I had time for slaving away making laundry detergent in my spare time. So for the first 4 years of our marriage, I bought Tide Free from Babies R Us, or something similar, with some store ad to save any money I could. I used these all the time.

During my first year as a stay at home mom in Spokane, something magical happened that opened my eyes to a whole world of money-saving, Do-It-Yourself, crafty goodness: Pinterest. After I saw some of my friends pinning "Do-It-Yourself (DIY) homemade laundry detergent", the task didn't seem quite as daunting and I started reading blog after blog of homemade laundry detergent recipes. I finally came across this one and I decided it looked easy enough. 3 incredients. I could handle this. I gave it a try and have never looked back.

I've shared this recipe with anyone who wants it. After my in-laws stayed for a couple weeks, my mother-in-law was asking for the recipe and now she uses it and loves it! That says something because she is a retired pediatrician and her husband is a farmer (she is very educated, as is her husband, but his work clothes are usually very dirty). And I can speak for myself that having 3 little ones, 5 and under including 2 rambunctious boys, we have lots of dirty laundry that stands as proof that this works.

5 Common questions:

  1. Does it really work, even on really soiled laundry?  Yes. Yes. . . And, Yes. I've been using this recipe for going on 3 years and it works great. I do pre-treat my really dirty stuff by scrubbing the spot immediately. For example, if the kids get ketchup or something on their shirt, I IMMEDIATELY soak it, scrub it with stain remover, etc by hand and then toss it in the hamper to wash later with the rest of the clothes. My clothes come out smelling great and clean every time.
  2. Does it smell bad? No, actually, I prefer the smell of the homemade detergent over store bought. It is more airy and lighter than the majority of soaps I've used. Plus, you can apparently add essential oils to get any desired smell like lavender, though I've never done this.
  3. Can you use it on an HE front loading washing machine? Sure. This is taken from This Frugal Life Blog which I sited earlier, "Homemade laundry detergent does not contain sulfates so it will not suds up like ordinary detergent but don’t worry, your clothes are getting clean. Plus, because this formula is low-sudsing, this is safe for you folks with front loading HE washers."
  4. Does it take a long time to make? Do I really have time for this? Recipe only takes about 15 or 20 minutes to make and lasts much longer than a store bought box. The only real time consuming task is using a cheese grater to grate the bars of soap.
  5. Is it safe for children and babies? What about sensitive skin? Though the Fels-Naptha bar of soap does warn that it is a skin and/or eye irritant if directly touching skin or gets in eyes for a long period of time, I have found the soap is kid-friendly. Gabriel has occasional eczema and this soap does not irritate or cause any flare ups. In fact, I haven't noticed any flare ups while using this soap. I also have sensitive skin and rashes are common and most times come with unknown etiologies. This detergent has not caused me any trouble either. As for newborns and babies, I decided to use store bought (think Dreft or Tide Free) for when my little ones are newborns and switch to the homemade once they hit the 1 year mark. I haven't done enough research to see if is gentle enough for them. But I have no problems with them after the year mark.
  6. Will it gunk up my washer? Does the soap really dissolve? Like it says above, it does not suds up like normal store bought soap, but it really does clean your clothes. I have NEVER noticed any undissolved soap in my washer or anything like that.
  7. How much do I use per load? 1 Tablespoon for a small load, 2 Tablespoons for a normal - large load, and 3 Tablespoons for a heavy or extra large load.
  8. Can you use extra stain remover with your homemade detergent, like bleach, etc? Yes. I add bleach for my towels and whites (I always have) and it's fine. I also sometimes add some Era detergent to especially stinky laundry (like if my kids wet the bed or something), though it isn't necessary. (It's just what my mom always used so it's habit.) 
  9. Where can I find Fels-Naptha soap? I've always found it at Wal-Mart, in the laundry detergent aisle. Birmingham people, I've found it off Lakeshore, off Lorna road, and I believe off Highway 150 Walmarts.
  10. What's the difference between using Fels-Naptha soap and Zote soap? I honestly can't tell a difference and the last batch I made I mixed both a batch of Fels-Naptha and Zote and used a combination of the two. This blog did a comparasion on the two soaps and she had some helpful insight and noticed a big difference between the two. She recommended Fels-Naptha for heavier, greasier stains and zotes for more sensitive skin, and more everyday laundry. The price is a difference, however. Zote is $0.97 at walmart for more than twice as much (14 oz) soap as Fels-Naptha (5.05) for the same $0.97. It's still super cheap, but you get more than twice as much soap with Zote than with Fels-Naptha. Check out her blog for more details on the differences between these two soaps.

DIY Laundry Detergent-the Tutorial

You will need:
  1. 1 cup of Borax (Found in the laundry detergent aisle)
  2. 1 cup of Washing Soda (not to be confused with Baking soda-they are NOT the same thing. This is also found in the laundry detergent aisle)
  3. 1 bar of Fels-Naptha stain remover soap (the blog above says you can use Ivory bar soap but I've only ever tried Fels-Naptha and Zotes soap). For this particular tutorial, I tried something new by combining 1 bar of zotes soap (also found at Walmart in the laundry section) because it's twice the size of Fels-Naptha and is the same cost. Zote is pink and Fels-Naptha is yellow. You'll notice the pink and yellow in the picture below. If you do the recipe with just Zote soap, it will be pink only. If you do the recipe with Fels-Naptha only, it will be yellow only.
  4. Cheese grater and food processor (optional food processor just to mix the powder and the grated soaps to a very fine texture)
This is what the Fels-Naptha looks like. (wrapper on bottom and soap is gold colored)

Step 1:

Grate the Fels-Naptha soap. It doesn't matter large or small chunks, but this is the part that takes awhile. Maybe 15 minutes.

Step 2:

Mix the Borax and the Washing Soda with the grated bar soap.

Step 3: (Completely optional)

Add the grated soap/powder mixture to your food processor until it's all combined and is a fine consistency, sort of like the powder detergent you'd buy at the store. In the picture below, the bowl on the right has the powder and grated soap and the bucket on the left has the finished product. FYI, the first two years or so I made this soap, I always just stopped after mixing the grated bar with the powder. So my detergent looked like the bowl on the right and it worked just fine. I just prefer to use the food processor because I like the consistency better. It's a little easier to scoop up a Tablespoon of the detergent that is more unified rather than trying to make sure you get enough pieces of grated soap and powder.


Step 4:

Put your finished product in a handy little container with a measure spoon (1 Tablespoon) and that's it! 1 Tablespoon for a small load, 2 Tablespoons for a normal - large load, and 3 Tablespoons for a heavy or extra large load. Easy, right?


Price Breakdown and Comparison: Homemade Powder Detergent VS. Ultra Tide Original Powder Laundry Detergent


Ultra Tide Original Powder Laundry Detergent:

At Wal-Mart, Ultra Tide Original Powder Laundry Detergent costs $17.97 for 102 loads. See for yourself. That comes out to roughly $0.18/load.

Homemade Powder Detergent, a quadruple batch:

4 bars Fels-Naptha soap-$0.97 a bar, or  $3.88 for 4 bars.
Borax- $3.38 for the entire box, the quadruple batch used about 1/2 the box or $1.69.
Washing Soda-$3.24 for the entire box, the quadruple batch used about 2/3 of the box, or $2.16.

Fels-Naptha      $3.88
Borax               +$1.69
Washing Soda    $2.16

Grand Total:      $7.73 for 220 loads. That comes to roughly $0.04/load.

This means it is 4.5 times cheaper to use homemade laundry detergent than it is to use store bought! It's even more savings if you use Zote soap because you get more than twice as much soap as Fels-Naptha for the same price. That's why I did a combination batch last time I made it with both Fels-Naptha and Zote. Using the combination of 1 Zote bar (I basically substituted 1 zote=2 Fels Naptha)  and 2 Fels Naptha for a quadruple batch, it comes out to $.03/load.


What are you waiting for???

Almost 3 years ago, when I first made this soap, I was really excited and telling my mom how I made my detergent and how much money is has saved us. After telling her the 3 simple ingredients, she said, "So, you're making soap from soap...?" And I guess, in a way she's right. But hey, it works, it's easy, it's safe, and it's CHEAP! So I ask you, "What are you waiting for?"

Happy money-saving Monday!


Monday, January 13, 2014

Money Saving Monday: Top 10 favorite things about Aldi

If there is one thing I've realized about grocery shopping while Christopher and I have been married, it is that I love, love, LOVE saving money. The fact that we were basically broke since we've been married, added substantial medical school debt, and basically started having babies as soon as we could has only exaggerated my desire to save money and find a good deal on any and everything! I've decided to do some random "Money Saving Monday" posts about thrifty tricks I've discovered over the last few years. And believe me, there are quite a few!

 I just love me some Aldi.  When we lived in Wichita for the two years Christopher did his 3rd and 4th years of medical school, I started shopping at Aldi frequently, but mostly for those staple food items: bread, milk, eggs, and chicken breasts. I still shopped at Dillons quite a bit for the things I either wasn't brave enough to try at Aldi, preferred over Aldi, or simply Aldi didn't have.  Now, there are some things that Aldi doesn't have and some things Aldi only carries seasonally (for example their cocktail sauce is usually only spring and summer and their "pumpkin" flavored coffee creamer, yogurt, and such is usually only Fall and Winter).  Then, when we moved to Spokane, Washington for Christopher's 1st year of residency, I realized just what we were missing by not shopping at Aldi. We basically had Wal-Mart as our only option for cheaper grocery shopping, so we hit Wal-Mart for EVERYTHING on our shopping list. We had a pretty strict budget of $175 every 2 weeks for groceries and that was for our family of 4 (at the time). Surprisingly, I was able to stay right around our budget, but that was also taking into account the fact that Christopher frequently brought home extra food from the hospital from his meal card money that the hospital gave to him each month (boy, do I wish he still had a hospital meal card. I miss those extra desserts, salads, and wraps.).  Now that we've been living in Alabama for going on our 2nd full year, I've rediscovered my love for Aldi with one that is only about 5 minutes from where we live. Now I buy everything we need at Aldi and the VERY rare, few things that they do not have or actually are cheaper else where (like toothpaste and diapers, for example, which are cheaper at Wal-Mart) and I couldn't be happier about it! Here are my top 10 favorite things about Aldi, and specifically the Aldi here in Homewood, Alabama.

Top 10 Favorite Things About Aldi


  1. Best milk, egg, produce, and grocery in general prices around! Milk sells for $2.99, every day, all year round, no kidding. I haven't seen it close to that anywhere else. I've also been known to get Pomegranates for $0.69, Bananas for $0.44 and apples for $1.99/bag. I believe the Eggs I bought last were $1.79/dozen. This week, a 3 pack of green peppers sells for $0.99 and a bag of salad sells for $0.50. They have the "Produce of the Week" deal which highlights a few different ones for extremely cheap. They rotate the produce of the week, so watch the local adds to catch the deals!
 

  1. The non-grocery items aren't too shabby on prices either! I bought a set of 2 decorative pillows (that sit on our couch now) for around $10.00 and I hadn't been able to find them that cheap anywhere else except used at a garage sale.
  2. Shopping at Aldi forces me to be a little more "green". I bring my own cloth re-usable bags since Aldi doesn't give out plastic or paper bags. If you forget to bring your own bags, no fear; you can either buy some re-usable ones or plastic ones at the counter or you can find extra boxes from the aisle (previously used for food that have all been sold) and use them!
  3.  The shopping cart experience. For those of you who are unfamiliar with Aldi shopping carts, let me explain how they work. Lots of people seem to be confused by how the carts work and think you have to spend money on them. The carts are free, don't be fooled, but you have to have a quarter handy; not 2 dimes and a nickel, but an actual quarter. The carts are all at the front of the store and are locked together. When you deposit your quarter, it unlocks the cart and holds your quarter until you return it and lock it up again, at which point your quarter will pop out for you to have again. See, free carts if you return them back and lock them up again. I like to scout out people (especially older people) who are just finishing using their carts at their car, approach them with my quarter and ask to use their cart. It saves both of us the trip to the front of the store (them to get their quarter back and me to get my cart). I love this part because they usually look so grateful and surprised!
     
  4. I've made money off the cart system before. Let me explain. Like I said on #3, a lot of people seem to be confused on how the cart system works, especially first-timer Aldi customers. If you go to Aldi on a weekday, I can almost guarantee that you'll make money off the cart system, too. Here's why: a lot of first-timers think you have to pay to use the carts and don't realize that if you bring your cart back to the front and lock it up, you will receive your quarter again. I've found stray carts in the parking lot and also found carts at the front and in the cart line, but not locked with the chain (so the quarter was still there). One particular weekday morning, I found about $1.00 in quarters.  Not a huge savings, but it's something!
  5. The alcohol selection. Now I have to clarify that the Midwest Aldi chain does NOT sell alcohol in their stores. But here in the south, Aldi has a good selection of wine, beer, margaritas and such. My favorites are the sweet wines so the Winking Owl White Zinfandel is one of our favorites and the best part is that it's only $2.89 a bottle! Can't beat that price! We've also tried the Landshut Sweet Red which is pretty tasty and is also only $4.99.  https://www.aldi.us/en/grocery-items/wine-beer/white-wines/white-wines-detail/ps/p/winking-owl-white-zinfandel/
  6. The wine has an AWESOME guide on the back of the bottle that sort of acts as a "wine for dummies", or at least has for me. It has a scale that rates the wine from dry to sweet, full to thin, where it's imported from (Italy, Germany, California, etc.), the flavors in the wine (strawberry, cherry, grape, etc.), and what it tastes good with (desserts, chicken, beef, etc.). I really appreciate this as I really know nothing about wine and this has sort of taught me anything I do know. Nothing worse than buying some wine to try and not liking it. Ask Christopher about his first drink on his 21st birthday at Timberline.
  7. Close parking every day, every time, no exceptions. I've never had to walk far to get inside Aldi and I LOVE that, especially when I go with the little ones (which I try to make as infrequently as possible because we all know shopping with little ones is a type of insanity; at least it always feels like that for me.)
  8. Flowers. Few people realize or know that you can buy a bouquet of roses, wild flowers or seasonal flowers for probably half the price you could anywhere else. I'll also add that they are beautiful and last just as long if not longer. They are usually by the check-out lines.
  9. Aldi now carries a lot of healthier, organic and natural foods. I love to get hummus and pita chips there because I can get the hummus for $2.99 and pita chips for $1.99. Also, they have an entire section of organic fruits and veggies including carrots and apples. I've also noticed some goat cheese and other "fancy" cheeses that I don't even know the name for without looking at an Aldi add. I've tried their almond butter which I thought was pretty tasty. I know they have egg beaters and soy milk, too, although I haven't tried the soy milk to vouch for them.

How Aldi Saves You Money                      

I recently came across this blog that does a great job explaining how Aldi saves you more. Another reason is that Aldi cuts most of the overhead so we save the extra money. They only hire as little employees as they need, which is often why you see them working their tails off and busy the entire time you are shopping. They also don't have much shelving. The boxes are stacked on top of each other which gives the store a sort of messy, raw look, but you get used to it very easily. They also don't really have aisles, which makes you zig-zag around the store to get your things, which in turn ensures you see EVERYTHING the store as to offer. The carts and the bagging cut cost which I described above as one of the things I personally love about Aldi. And another thing about Aldi I've heard rumor as true is they sell other big name brand stores overstock, but put an Aldi brand on it. I've heard this about their chicken (overstock from Tyson, I believe), but I think this is one of the reasons I love the groceries so much. Honestly, I can't tell a difference with some of their brands vs. big name brands.

If you've been thinking about trying Aldi but haven't yet, I HIGHLY recommend that you do. Even if you just try out some basics like milk, bread (for $0.89 a loaf), or eggs. Just be forewarned, it's addicting. Especially once you see how full your cart can be for under $200! I shop every 2 weeks and very rarely spend over $190 for the 5 of us and I always have an overflowing cart including 5 gallons of milk and 5 dozen eggs. (Our budget still sits around $175, but sales tax is 9%, so that does make it a little more difficult). I frequently get asked by the price-checker how I fit it all in there. My reply, "Tetris".

Happy Monday and Happy Shopping!